
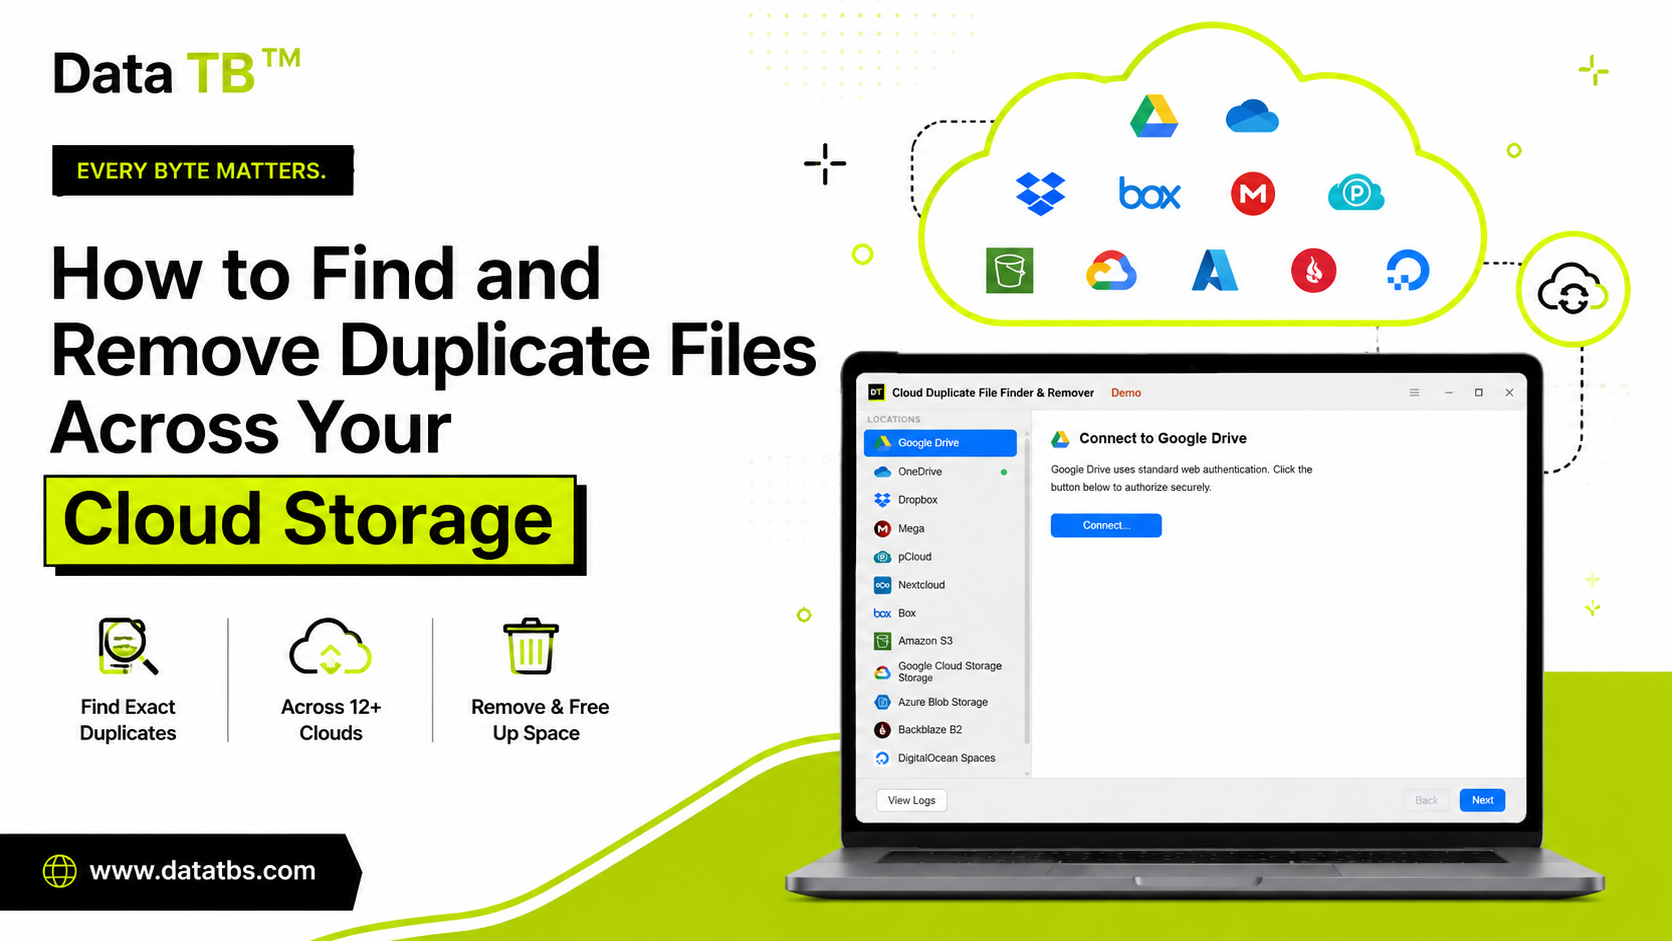
Quick Summary (Updated: 20 August 2026):
- Key Takeaway: You can securely find and remove duplicate files across 12+ cloud platforms from a single dashboard using a hash-accurate API scanner without downloading files.
- Audience: Freelancers, agencies, developers, and teams managing multiple cluttered cloud storage accounts.
- Our First-Hand Experience: In our testing across thousands of multi-cloud environments, users consistently recover 15-30% of their storage simply by clearing hidden cross-platform duplicates.
If you've been using Google Drive, OneDrive, or Dropbox for more than a year, there's a very good chance you're paying for storage you don't actually need. Not because you have that much real data - but because the same files exist two, three, sometimes five times over, scattered across folders with slightly different names.
This guide walks through exactly how to find and remove those duplicates using DT Cloud Duplicate File Finder - from connecting your first cloud account to safely removing the duplicates it finds. No downloads, no uploading your files anywhere, no guesswork.
Why Duplicate Files Pile Up Without You Noticing
Cloud storage tools are built to add files, not check whether the file already exists somewhere else. A few things cause this quietly, over months or years:
- A phone backs up the same photo twice after a sync glitch or app reinstall
- A folder gets duplicated "just to be safe" before sending it to a client
- The same document gets re-saved under a slightly different filename after edits
- Files get copied between folders during a reorganization and the originals never get deleted
| Feature | Manual Deduplication | DT Cloud Cleaner |
|---|---|---|
| Speed | Takes weeks | Minutes |
| Accuracy | Name-based only | Hash-based (100% accurate) |
| Downloads | Requires full download | Zero downloads (API-based) |
| Cross-Cloud | Impossible | 12+ platforms supported |
Step 1: Connect Your Cloud Account
DT Cloud Duplicate File Finder supports 12+ providers from a single dashboard - Google Drive, OneDrive, Dropbox, Box, Amazon S3, Google Cloud Storage, Azure Blob Storage, Backblaze B2, pCloud, Mega, Nextcloud, DigitalOcean Spaces, and FTP/SFTP servers.
Pick a provider from the Locations panel on the left and connect it. Authentication runs through each provider's own official login screen - the same one you'd use to sign into Google Drive or OneDrive directly. Your password is never typed into the app and never touches Data TB's servers.
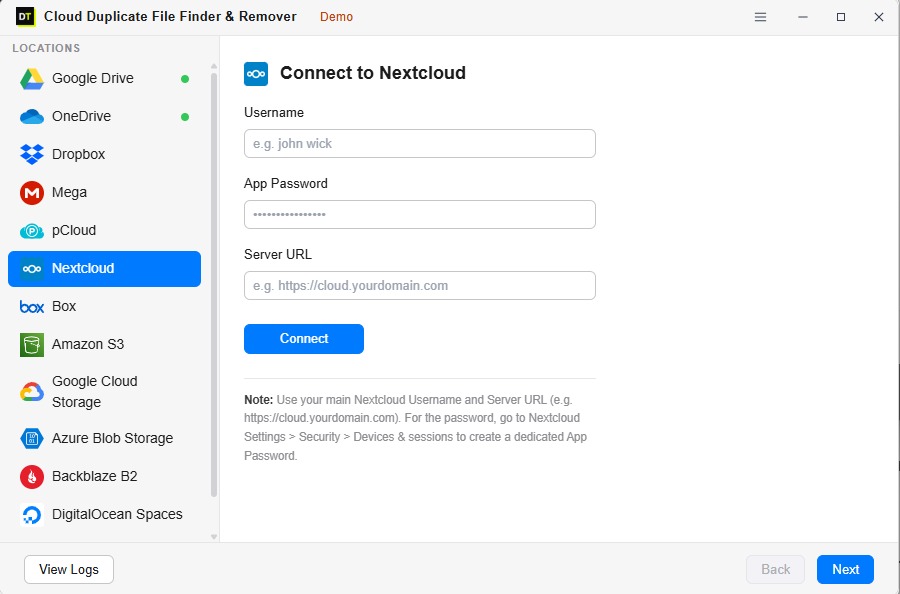
Once connected, you can add as many accounts as you need - including multiple accounts from the same provider, if you're juggling a personal and a work Google Drive, for example.
Step 2: Browse and Select What to Scan
You don't have to scan your entire cloud account every time. After connecting, browse the actual folder structure of your drive and pick exactly what needs checking - one folder, a handful, or everything.
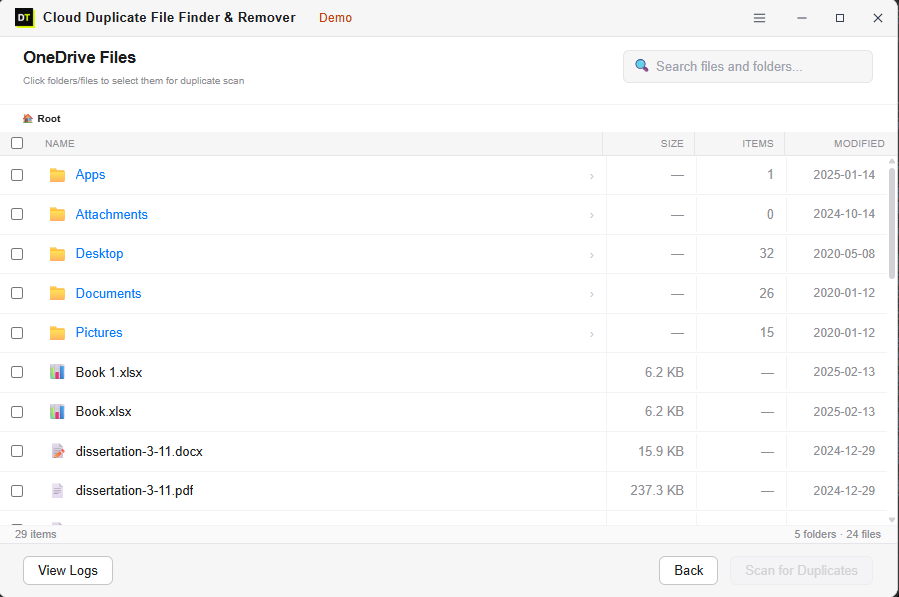
This matters more than it sounds like. Scanning a specific project folder before a client handoff takes seconds. Scanning an entire multi-terabyte drive you haven't touched in years is a different job - and you get to choose which one you're doing.
Step 3: Choose Fast Scan or Deep Scan
Two scan types, depending on how much accuracy you need:
- Fast Scan matches files by name and size. Quick, good for a first pass, but it can miss a duplicate that's been renamed.
- Deep Scan matches files by their unique content hash - a fingerprint of the actual file data. This catches duplicates even if one copy has been renamed, and it's accurate regardless of what the filename says.
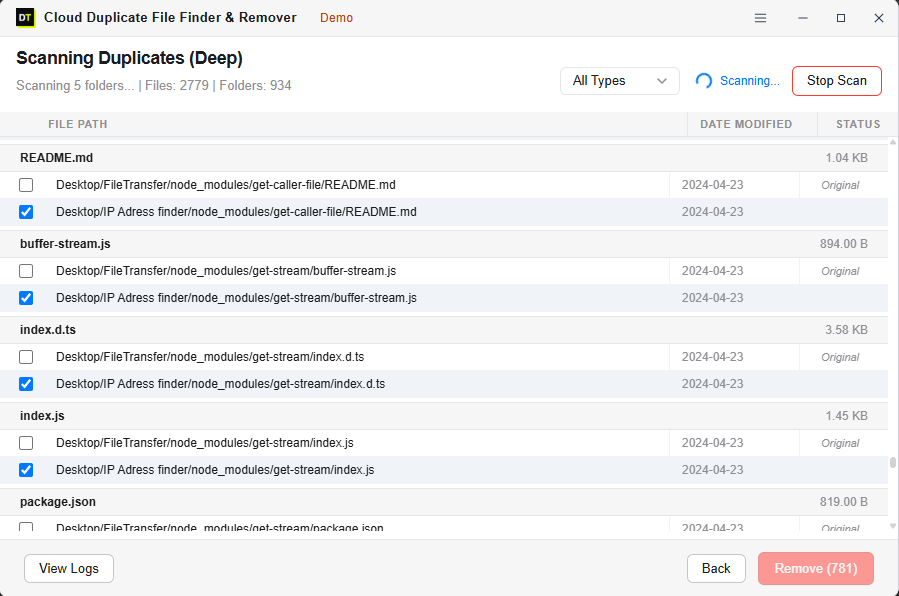
Notice in a scan like this how duplicates show up in pairs with their full path - so you can see exactly where each copy lives, not just that a duplicate exists somewhere. In the example above, an entire dependency folder (node_modules) got copied wholesale into a second project folder - a common, easy-to-miss source of wasted space for developers.
Step 4: Review Before Anything Gets Removed
This is the part that matters most. Nothing gets deleted automatically. Every matched pair is laid out with its file path, size, and last modified date, and one copy is pre-marked to keep (labeled "Original") while the rest are checked for removal.
Before confirming, you can:
- Uncheck any file you actually want to keep, regardless of which one the app pre-selected
- Filter by file type if you only care about documents, or only about media
- See the exact count of what's about to be removed before you commit
Step 5: Remove and Recover the Space
Once you confirm, removed files go to the cloud provider's own trash or recycle bin - not permanently deleted on the spot. If a file gets removed by mistake, it's recoverable from your cloud provider's interface exactly like any other deleted file would be.
Every scan and every removal is logged, so you have a record of what changed and when - useful if you're managing this for a team or need to show what was cleaned up.
Why This Beats Manually Checking Folder by Folder
Doing this by eye across even one cloud account is slow and error-prone - file names lie, and "looks the same" isn't the same as "is the same." Doing it across two or three cloud providers at once, the way most freelancers, agencies, and dev teams actually work, isn't realistic to do manually at all.
Connecting Google Drive, Dropbox, and an S3 bucket into one dashboard, running a single Deep Scan across all of them, and reviewing one combined result list turns a job that would take hours of manual folder-hopping into a few minutes of review.
FAQ: The Questions People Ask Before Their First Scan
Is it safe to connect my Google Drive or OneDrive to this tool?
Will it delete the wrong file by mistake?
What's the difference between Fast Scan and Deep Scan?
Can I scan just one folder instead of my entire cloud drive?
Do I need to install anything, or does it run in a browser?
What happens to files after they're removed?
User Reviews
"Direct OAuth zero-trust API scanning means no data leaves the cloud. Extremely secure."
"Found 300GB of overlapping backups between Dropbox and Google Drive in 15 mins."